#dng icons
Explore tagged Tumblr posts
Text


#shin ryujin#ryujin#hwang yeji#yeji#itzy#kpop#couple#shipp#ryeji#icons#itzy icons#ryeji icons#shin ryujin icons#ryujin icons#hwang yeji icons#yeji icons#couple icons#kpop icons#dng
20 notes
·
View notes
Text
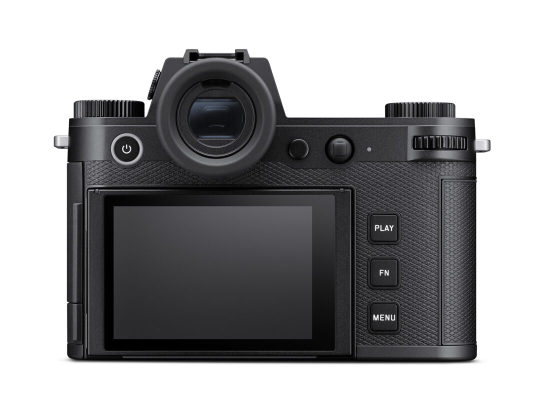
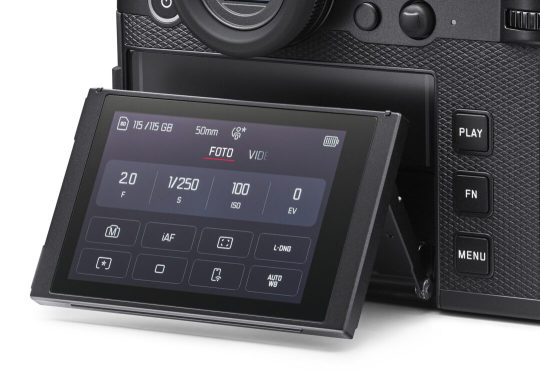
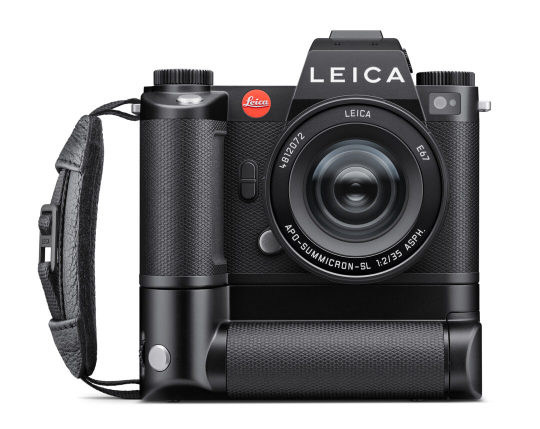
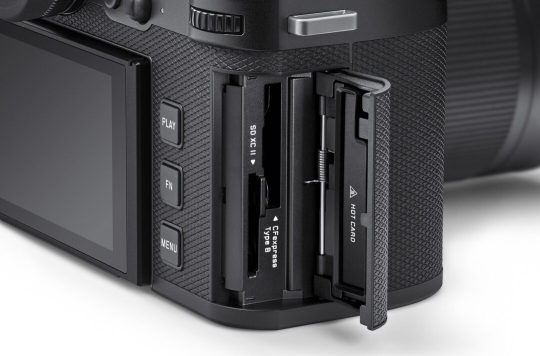
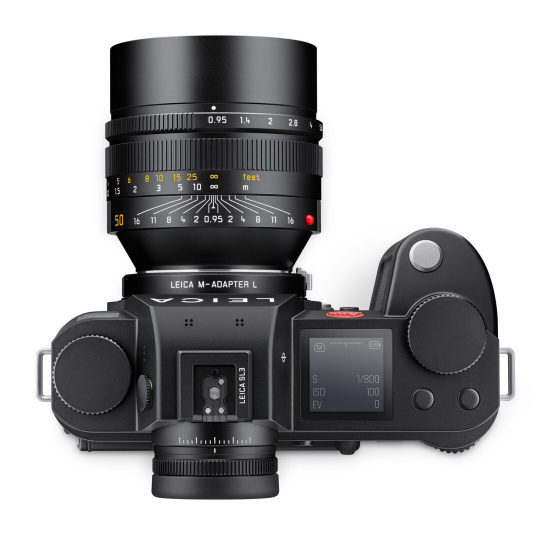
Leica SL3 - Neues Flagschiff mit 60 Megapixel
Im Jahr 2015 führte die Leica Camera AG das SL-System ein und kombinierte damit die beiden Welten Fotografie und Videografie auf einzigartige Weise. Von Beginn an legte Leica den Fokus auf eine enge Zusammenarbeit mit den Nutzerinnen und Nutzern. Es entstand ein System, das den höchsten Ansprüchen an Bildqualität, Bedienkomfort und Fertigungsqualität gerecht wird. Nun stellt das Traditionsunternehmen nach mehr als vier Jahren die nächste Kamerageneration des spiegellosen Vollformatsystems vor: die Leica SL3. Leica hat die Zeit genutzt, um die Kamera deutlich aufzuwerten. Das IP54-zertifizierte Metallgehäuse der spiegellosen Vollformatkamera ist nun etwa fünf Millimeter schmaler und drei Millimeter flacher und das Gewicht wurde von 840 Gramm auf etwa 770 Gramm (ohne Akku) reduziert.
Neue Bedienelemente: Leica hat auch die Bedienelemente und das Menü überarbeitet: Das Einschalten der Kamera erfolgt nun über einen beleuchteten Knopf auf der linken Seite, der sie auch in einen energiesparenden Standby-Modus versetzen kann, aus dem sie mit dem Auslöser schnell wieder aufgeweckt werden kann. Die Rückseite der Kamera bleibt aufgeräumt, wobei die drei beschrifteten Tasten (Play, Fn, Menü) von links nach rechts verschoben sind, um die Bedienung mit der Greifhand zu erleichtern. Oben links wurde ein drittes Einstellrad zum Einstellen des ISO-Werts hinzugefügt, während die anderen beiden Einstellräder voreingestellt sind, um Blende und Verschlusszeit zu steuern.
Es ist möglich, die fünf Funktionstasten nach Belieben zu belegen. Eine clevere Lösung besteht darin, dass beim längeren Drücken der Tasten ein Mini-Menü erscheint, über das die Funktionen neu belegt werden können. Ähnlich verhält es sich mit der Menü-Taste. Durch einmaliges Drücken wird ein Schnellmenü mit anpassbaren Kacheln geöffnet, während ein längeres Drücken zum Hauptmenü führt. Obwohl die SL3 kein PASM-Rad hat, ist es dennoch einfach, zwischen den Belichtungsprogrammen zu wechseln, indem man das Daumenrad drückt und dreht.
Neue Menüs: Die neuen Menüs des Geräts können einfach über den großen Touchscreen mit einer Größe von 3,2 Zoll gesteuert werden. Es gibt separate Menüsysteme für Fotos und Videos. Die Icons wurden überarbeitet und sind nun etwas größer und eleganter als zuvor, intern auch als "Leicons" bezeichnet.
Die Auflösung des Monitors wurde leicht erhöht (von 2,1 auf 2,3 Millionen Punkte) und er kann nun nach oben und unten geneigt werden, jedoch nicht in die Selfie-Position gebracht werden. Der OLED-Sucher (5,76 Millionen Punkte, 0,78x, maximale Bildwiederholrate von 120 fps) bleibt unverändert. Leica hat auch den Akku aktualisiert: Der BP-SCL6 hat jetzt eine Kapazität von 2220 mAh statt 1860 mAh und kann sowohl in der SL2 als auch in der SL3 verwendet werden. Der SL2-Akku funktioniert auch in der SL3, jedoch mit einer geringeren Leistung. Wenn man die Akkulaufzeit verdoppeln möchten, kann man den optionalen Handgriff HG-SCL7 verwenden.
Bildsensor mit Triple-Resolution: Der Bildsensor, der ohne Tiefpassfilter auskommt, hat nun eine höhere Auflösung von 60 Megapixeln im Vergleich zu den 47 Megapixeln zuvor. Sein Empfindlichkeitsbereich liegt zwischen ISO 50 und 100.000 und ähnelt dem Bildsensor, der bereits in der Leica M11 und Q3 verwendet wird. Der Sensor verfügt auch über eine "Triple Resolution"-Funktion, die es ermöglicht, im DNG-Raw-Modus neben der vollen Auflösung von 60 Megapixeln auch mit 36 oder 18 Megapixeln aufzunehmen, um kleinere Dateien zu erzeugen.
Hybrid-Autofokus: Der SL3 unterscheidet sich von der M11 dadurch, dass der Sensor mit Phasenerkennungspixeln für den Hybrid-Autofokus ausgestattet ist, was wahrscheinlich ein Ergebnis der Technologiepartnerschaft mit Panasonic ist. Panasonic stellte den neuen Hybrid-Autofokus erstmals in der Lumix S5II vor. Bei Wettbewerbern wie Canon, Nikon und Sony sind hybride Autofokussysteme bereits Standard. Der Autofokus des SL3 umfasst eine Motiverkennung für Menschen und Tiere, andere Motive wie Fahrzeuge oder Vögel erkennt er jedoch nicht.
Integrierter Bildstabilisator: Laut Hersteller bietet der Fünf-Achsen-Bildstabilisator im Inneren der Kamera eine Wirksamkeit von fünf Blendenstufen. Wir haben bei einer Brennweite von 35 mm ohne Stativ scharfe Bilder mit einer Verschlusszeit von 1/13 s aufgenommen. Obwohl die SL2 und SL2s die Pixel-Shift-Funktion hatten, hat Leica sie bei der SL3 zunächst weggelassen. Wenn jedoch viele Fotografen dies wünschen, könnte sie durch ein Firmware-Update nachgerüstet werden. Der mechanische Verschluss der Kamera hat eine kürzeste Verschlusszeit von 1/8000 s, während der lautlose elektronische Verschluss eine kürzeste Verschlusszeit von 1/16.000 s hat. Die SL3 kann Serienaufnahmen mit bis zu 15 Bildern/s aufnehmen (ab 9 Bildern/s mit E-Verschluss), aber der Autofokus wird nur bis zu 5 Bildern/s nachgeführt, danach für etwa 90 aufeinanderfolgende Bilder nicht mehr.
8K-Video und neue CFexpress Speicherkarten: Die SL3 kann dank ihres hochauflösenden Bildsensors und des neuen Bildprozessors Leica Maestro IV Videos in 8K-Auflösung aufnehmen, im Gegensatz zur SL2, die maximal 5K erreichen konnte. Zusätzlich steht weiterhin die Option (Cinema-)4K zur Verfügung. Profile wie L-Log und HLG werden ebenfalls unterstützt. Eine neue Funktion ist die Möglichkeit, intern mit Apple ProRes-Raw aufzuzeichnen, jedoch nur auf CFexpress B-Speicherkarten. Im Gegensatz zur SL2 hat die SL3 nur einen SD-Kartenschlitz, der SD-Karten mit UHS-II-Geschwindigkeit unterstützt. Weitere Verbesserungen umfassen einen Time-Code-Terminal sowie aktualisierte Wi-Fi- (Version 6) und Bluetooth- (Version 5.1) Funktionen.
Am vergangenen Dienstag fand für fünfzig ausgewählte Fotografen eine Produktvorstellung der SL3 statt. Dabei konnte ich mich von der Leistungsfähigkeit, Haptik und Qualität persönlich überzeugen.
Liebe Leser*innen, bitte beachten Sie, dass dieser Beitrag keine bezahlte Werbung darstellt. Der Inhalt des Beitrags fasst lediglich die technischen Neuerungen zusammen. Ich wurde von LEICA nicht für die Erstellung des Beitrags bezahlt.
Bildquelle: Leica Camera AG
0 notes
Text
Come trasformare il tuo smartphone Android in una macchina fotografica professionale
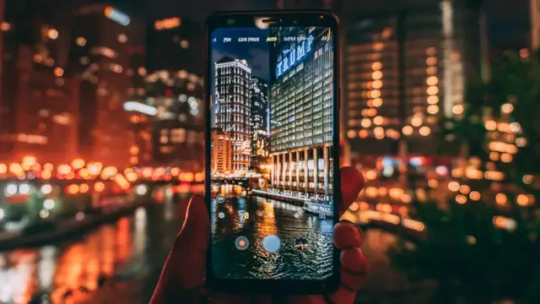
Se ami la fotografia e vuoi scattare foto di qualità con il tuo smartphone Android, ci sono alcuni trucchi e accessori che puoi usare per migliorare le tue prestazioni. In questo articolo ti mostreremo come trasformare il tuo smartphone Android in una macchina fotografica professionale con pochi semplici passi.
Scopri come trasformare il tuo smartphone Android in una fotocamera professionale con app, obiettivi e luci. Segui i nostri consigli e scatta foto fantastiche.
Se vuoi scattare foto di qualità con il tuo smartphone Android, non devi per forza comprare una fotocamera professionale. Con alcuni trucchi e accessori puoi trasformare il tuo telefono in uno strumento fotografico potente e versatile. In questo articolo ti mostreremo come scegliere la giusta app fotocamera, come aggiungere degli obiettivi al tuo smartphone e come usare una buona illuminazione per creare delle foto fantastiche.
Scegli la giusta app fotocamera
Il primo passo per trasformare il tuo smartphone Android in una macchina fotografica professionale è scegliere la giusta app fotocamera. L'app predefinita del tuo telefono potrebbe non offrirti tutte le funzionalità e i controlli che ti servono per scattare foto di qualità. Per questo ti consigliamo di provare alcune app alternative che ti permettono di regolare manualmente parametri come esposizione, messa a fuoco, bilanciamento del bianco, ISO e altro. Alcune delle migliori app fotocamera per Android sono: Camera FV-5
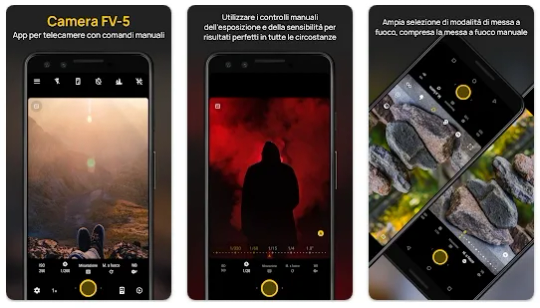
Camera FV-5 è un'app fotocamera avanzata per Android che integra alcuni comandi manuali simili a quelli delle fotocamere DSLR e porta l'esperienza fotografica su Android a un livello superiore. Con questa app puoi controllare la messa a fuoco, l'ISO, l'esposizione, il bilanciamento del bianco, il flash e altre funzionalità. Puoi anche scattare foto in formato JPG, PNG o DNG (simil-raw) e registrare video con Cinema FV-5. Per usare l'app devi aprire la fotocamera e toccare le icone sullo schermo per accedere ai vari comandi. Puoi anche personalizzare le impostazioni nel menu Open Camera
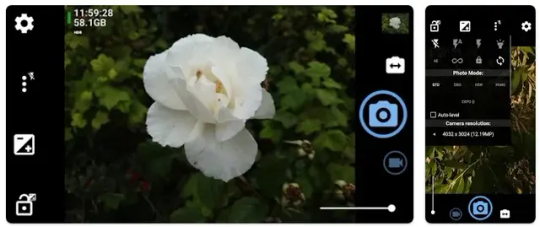
Open Camera è un’app fotocamera gratuita e open source per Android che offre diverse funzioni avanzate, tra cui la stabilizzazione dell’immagine, il controllo manuale di esposizione, ISO, messa a fuoco e bilanciamento del bianco, il supporto per il formato RAW, il timer, il time lapse e molto altro. Per usare l’app devi installarla dal Play Store e concederle i permessi necessari per accedere alla fotocamera e al microfono. Una volta aperta l’app, puoi toccare le icone sullo schermo per modificare le impostazioni della fotocamera o scattare foto e video1. Puoi anche personalizzare le opzioni nel menu delle impostazioni. Snapseed
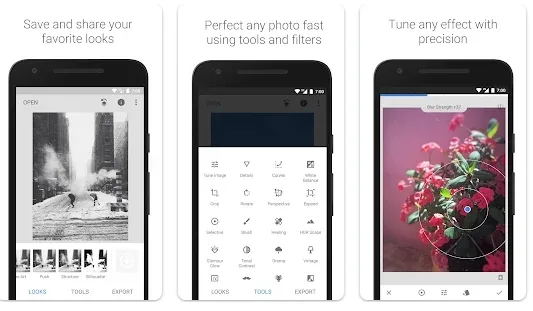
Snapseed è un’app di photo-editing gratuita e sviluppata da Google che ti permette di applicare filtri e modificare rapidamente le immagini sul tuo smartphone o tablet Android. Con questa app puoi regolare il colore, l’esposizione, il contrasto, la saturazione, la nitidezza e molto altro. Puoi anche aggiungere testo, cornici, effetti vintage, HDR e tanto altro. Per usare l’app devi installarla dal Play Store e concederle i permessi necessari per accedere alle tue foto. Una volta aperta l’app, puoi scegliere una foto da modificare e toccare il pulsante Strumenti per accedere ai vari comandi. Puoi anche usare il pulsante Effetti per applicare dei filtri predefiniti4. Per confermare le modifiche devi toccare il simbolo √, mentre per annullarle devi toccare il simbolo X.
Aggiungi degli obiettivi al tuo smartphone
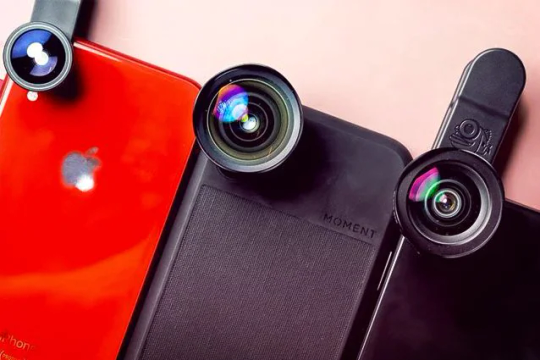
Un altro modo per trasformare il tuo smartphone Android in una macchina fotografica professionale è aggiungere degli obiettivi al tuo smartphone. Gli obiettivi sono degli accessori che si agganciano alla fotocamera del tuo telefono e ti permettono di cambiare la lunghezza focale, l'angolo di visione e la profondità di campo delle tue foto. Ci sono diversi tipi di obiettivi che puoi usare per ottenere effetti diversi: Obiettivo grandangolare: un obiettivo che ti permette di catturare una porzione più ampia dello scenario. È ideale per scattare foto di paesaggi, architettura o gruppi di persone. Obiettivo macro: un obiettivo che ti permette di avvicinarti molto al soggetto e catturare i dettagli più piccoli. È ideale per scattare foto di fiori, insetti o oggetti di piccole dimensioni. Obiettivo fisheye: un obiettivo che ti permette di creare un effetto distorsivo e curvo sulle tue foto. È ideale per scattare foto creative o divertenti. Alcuni dei migliori obiettivi per smartphone sono: Phorsen 15 in 1: un kit obiettivo multiuso che include un teleobiettivo 18x, un grandangolo, un macro, un fisheye, un filtro CPL, un flusso stellare radiale e un otturatore remoto. Gafild 12×50 HD Monoculare: un telescopio con ingrandimento 12x e diametro dell'obiettivo 50 mm che ti permette di avvicinarti alla natura e fotografare tutto da vicino. Apexel 10 in 1: un kit obiettivo universale che include un teleobiettivo 2x, un grandangolo 0.63x, un macro 15x, un fisheye 198°, un filtro CPL, una lente a specchio caleidoscopica a 3/6 linee e una lente a flusso stellato.
Usa una buona illuminazione
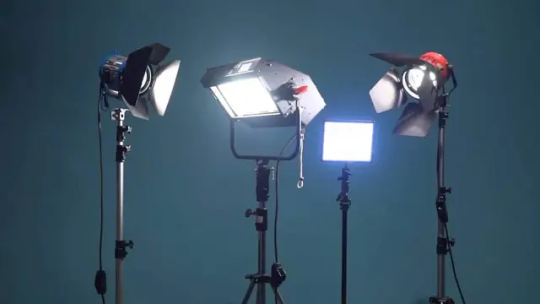
Un altro fattore fondamentale per trasformare il tuo smartphone Android in una macchina fotografica professionale è usare una buona illuminazione. La luce è essenziale per creare delle foto nitide, luminose e ben esposte. Se scatti in condizioni di scarsa luce o al buio, le tue foto risulteranno granulose, sfocate o troppo scure. Per questo ti consigliamo di usare sempre la luce naturale quando possibile o di usare delle fonti di luce artificiali quando necessario. Alcune delle migliori fonti di luce per smartphone sono: Lampade a led: delle lampade portatili che emettono una luce bianca e uniforme che puoi regolare in intensità e temperatura. Si possono agganciare al telefono o posizionare su un treppiede o su una superficie piana. Luci ad anello: delle luci circolari che si fissano attorno alla fotocamera del telefono e creano un effetto morbido e omogeneo sul soggetto. Sono ideali per scattare selfie o ritratti. Flash esterni: dei dispositivi che si collegano al telefono tramite Bluetooth o cavo e emettono uno scatto di luce potente e sincronizzato con la fotocamera. Sono ideali per scattare foto in ambienti bui o contrastati. Alcune delle migliori luci per smartphone sono: Yoozon Luce: una luce ad anello che ha 3 possibili temperature di luce: bianco caldo, bianco neutro e bianco freddo; ogni colore della luce può essere regolato su 10 diversi livelli di luminosità. ESDDI Luce LED: una lampa a led compatta e ricaricabile che ha 3 modalità di illuminazione: bianco freddo, bianco caldo e misto; ogni modalità può essere regolata su 5 livelli di luminosità. Godox A1: un flash esterno potente e versatile che ha una temperatura di colore di 6000K e può essere controllato tramite app dedicata; supporta anche la modalità TTL e la sincronizzazione ad alta velocità.
Conclusione
Come hai visto, trasformare il tuo smartphone Android in una macchina fotografica professionale non è impossibile. Basta seguire questi semplici consigli e dotarsi degli accessori giusti per migliorare le tue capacità fotografiche e ottenere dei risultati sorprendenti. Ricorda anche di sperimentare con le impostazioni della tua app fotocamera, con gli angoli di ripresa e con la composizione delle tue foto per creare delle immagini originali e creative. Speriamo che questo articolo ti sia stato utile e ti invitiamo a lasciare un commento se hai domande o suggerimenti. Se vuoi approfondire il tema della fotografia con lo smartphone, ti consigliamo anche il nostro corso online gratuito dove troverai tanti video tutorial pratici ed esercizi da fare.
Note finali
E siamo arrivati alle note finali di questa guida su come trasformare il tuo smartphone Android in una macchina fotografica professionale. Prima di salutare volevo informarti che mi trovi anche sui Social Network, per entrarci clicca sulle icone appropriate che trovi nella Home di questo blog, inoltre se la guida ti è piaciuta condividila pure attraverso i pulsanti social di Facebook, Twitter, Pinterest e Tumblr, per far conoscere il blog anche ai tuoi amici, ecco con questo è tutto Wiz ti saluti. Read the full article
0 notes
Text


ash costello 💖
#icons#icons rock#rock icons#rock bands#heavy metal#icons ash costello#ash costello#nyd icons#nyd#new years day#new years day icons#icons nyd#icons new years day#ashley costello#ashley costello icons#ash costello icons#icons lightroom#lightroom#dng icons#polarr icons#polarr edits#polarr#edits#lightroom presets#lightroom edits#polarr filters#filters#red filters#red icons
43 notes
·
View notes
Text

14 notes
·
View notes
Text




@origamimeowl there you go, :) I hope u like it
#kpop moodboard#moodboard#kpop icons#kpop edits#kpop#bts#bts jungkook#aesthetic#its the first time im dng a request#i hope u like it :)#i tried my best:/#nmb#requested
15 notes
·
View notes
Photo
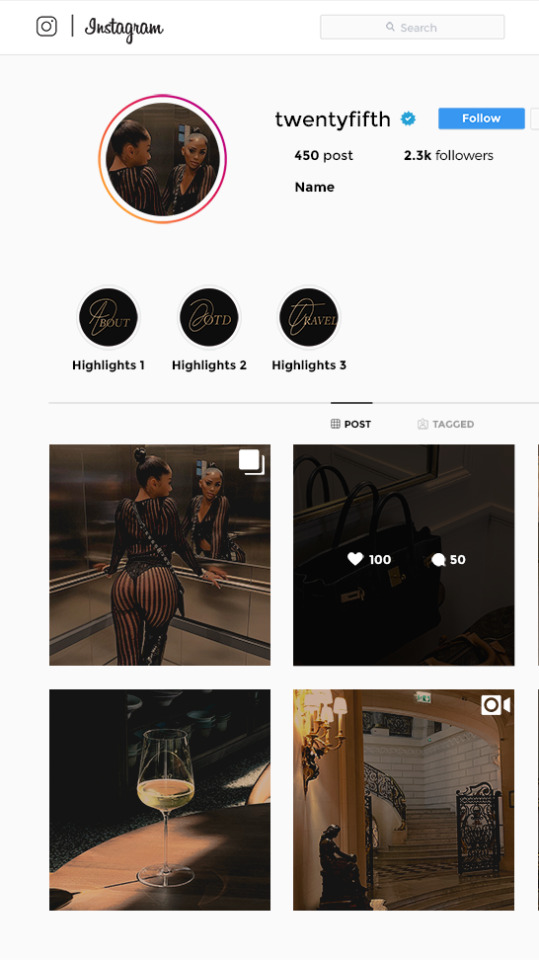

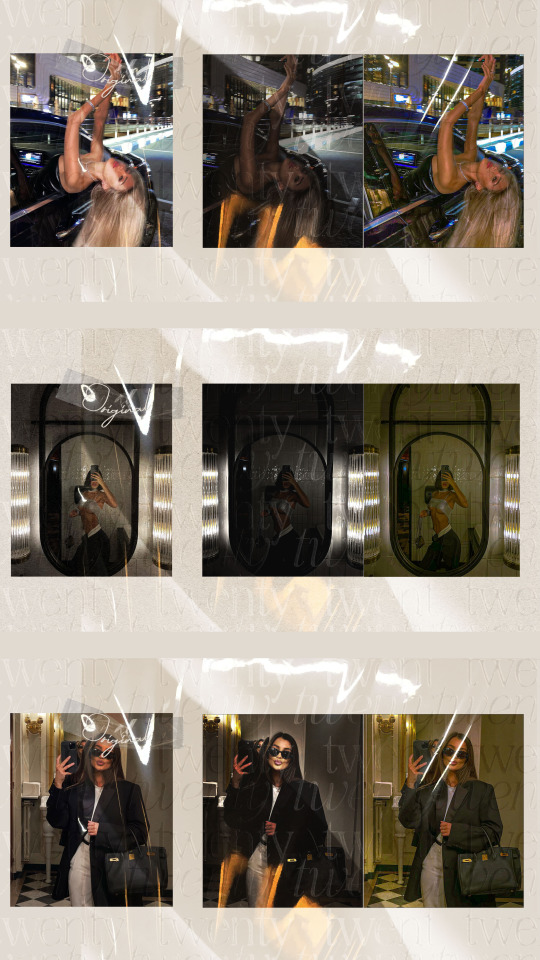
Ready to elevate your feed?
Get our exclusive aesthetic kit, prove to help boost engagement with our "NEW POST" overlays.
Pull in brands and companies with your polished look with our mobile lightroom presets perfect for: Night out, Car and Streetwear photos.
Tag us on instagram @TWENTYFIFTHDESIGNS for things we should add to the first update and to be featured!
Kit comes complete with:
- 21 Mobile and Desktop presets
- 3 Highlight Icons(free updates when more are added!)
- 5 "New Post" overlays with iOS inspired UI Overlay
© 2022 TWENTYFIFTHDESIGNS, All Rights Reserved TERMS OF USE: Including but not limited to: No sharing the files. No selling the files. Derivative works are prohibited.
TWENTYFIFTH Presets, Photo Presets, VSCO Presets, Edit, Editing, Lightroom Classic CC, Travel preset, Warm filter, preset filter, instagram feed, DNG, Instagram Preset, Presets, Mobile Filter, Lightroom presets, Lightroom Mobile, Android Preset, Lightroom Mobile Presets, Mobile Lightroom Presets, aesthetic presets, Lightroom mobile presets, preset filter, instagram preset, blogger filter, influencer filter, Summer preset, moody Presets, Brown preset, Editorial presets, Terracotta preset, Orange Preset, instagram template, Brown Aesthetic, model Aesthetic, new post, stickers.
#lightroom#presets#aesthetic kit#aesthetic colors#instagram#tiktok#model aesthetic#moody aesthetic#gold aesthetic#influencer#pack#graphic design#branding#brand identity
3 notes
·
View notes
Note
hi!! which podcast are u referring to in your last post?

omg these asks + all the tags on that post,, i cannot believe you all have not seen dng’s first trainwrecks podcast appearance. the bane of my existence but also so iconic.
the conversation itself is def too long to clip but it starts here in this vod! and george’s specific comment (which again. not that well articulated but the point he’s trying to make is pretty obvious) is at 2:27:25. def a bigggg nsfw warning for the whole convo but it’s a very interesting discussion, especially between train dream and austin
#georgenotfound#some of trains points are kinda eh ngl#but he def has a very different approach to sexuality than what is common in online progressive spaces#so i think there’s def some merit in listening to what he says#or at least i find it relatively interesting#but if u don’t care then yeah. the time stamp is for george’s comment#and dream also has a good addition right after where he mentions internalized homophobia#which i have talked about in this tag ->#trainwreckstv scuffed podcast#asks#anonymous
40 notes
·
View notes
Text
DiskDigger Importance || Recover Lost Files
In the Present scenario, Technology is growing too fast and we all are experiencing that our smartphone, PC, and Laptops carrying various files with the help of SD cards and internal memory. We will think that our files are in very secure places but if any file deleted unexpectedly then what you will do?. Don't worry, I already told you that tech is growing as fast as it can. Here I'm going to discuss the best data recovery services aka (DiskDigger) which are a perfect example of it. Let's go down to get more details of DiskDigger( Deep file recovery from any drive).
DiskDigger is a tool which can recover deleted files like photos, documents, music, video and much more.
DiskDigger Features:
DiskDigger can recover lost files from most types of media that your computer can read: hard disks, USB flash drives, memory cards, CDs, DVDs, and floppy disks. (Note: Make sure that you have to connect your device with a USB port to recover lost data from Android and IOS devices ). And one more important thing is you have to download the diskdigger app on your android phone to recover lost files. Suppose if your Android device uses a microSD card for saving the data, please remove the card and connect it directly to your PC using a card reader, so that you can scan it directly using DiskDigger for Windows.)
DiskDigger has two processes which you have to choose every time while scanning a disk. These methods are named as “dig deep” and “dig deeper“.
Dig Deep:
Undelete files from FAT (FAT12, FAT16, FAT32), NTFS, and exFAT partitions.
Recover any type of file.
Filter recoverable files by name and size.
Sort recoverable files by name, size, date, and directory.
Dig Deeper:
Scan (carve) entire disk for traces of specific file types.
Supported file types include:
Photos and images:
JPG - Pictures stored in digital cameras and on the Web (Joint Photographic Experts Group)
PNG - Portable Network Graphics
GIF - Graphics Interchange Format
BMP - Windows and OS/2 bitmap image
Running in Linux
TIFF - Tagged Image File Format
ICO - Windows Icon
ANI - Windows animated cursor
CR2 - Canon raw image
SR2 - Sony raw image
NEF - Nikon raw image
DCR - Kodak raw image
PEF - Pentax raw image
RAF - Fujifilm raw image
RW2 - Panasonic/Lumix raw image
LFP - Lytro raw image
MPO - Images from 3D cameras (Multiple Picture Object)
DNG - Adobe Digital Negative
SVG - Scalable Vector Graphics
HEIC/HEIF - High-Efficiency File Format image
PSD - Adobe Photoshop image
RAS - Sun raster image
PSP - Paint Shop Pro image
Thumbcache - Windows thumbnail cache
IFF - Amiga images and other media
ART - AOL Art images
WMF - Windows MetaFile
EMF - Enhanced MetaFile
WMZ, EMZ - Compressed MetaFiles
DICOM - Medical imaging format
WEBP - WebP images
PCX - ZSoft PCX images
CDR - CorelDraw images
INDD - Adobe InDesign documents
CP - Adobe Captivate documents
AI - Adobe Illustrator documents
Documents:
DOC - Microsoft Word document (2003 and below)
DOCX - Microsoft Word document (2007 and above)
XLS - Microsoft Excel spreadsheet (2003 and below)
XLSX - Microsoft Excel spreadsheet (2007 and above)
PPT - Microsoft PowerPoint presentation (2003 and below)
Custom Heuristics catalog || Disk Digger Pro
PPTX - Microsoft PowerPoint presentation (2007 and above)
VSD - Microsoft Visio document
PDF - Portable Document Format
XML - eXtensible Markup Language
HTML - HyperText Markup Language
RTF - Rich Text Format
WPD - WordPerfect document
WPS - Microsoft Works document
PUB - Microsoft Publisher document
XPS - XML Paper Specification
WRI - Old Windows Write document
ODT, ODS, ODP, ODG - OpenDocument formats
DPP - Serif DrawPlus document
PPP - Serif PagePlus document
Audio and video:
MP3 - Audio format widely used in digital media players (MPEG layer 3)
WMA - Windows Media Audio
AVI - Audio Video Interleave
WAV - Wave audio
MID -Musical Instrument Digital Interface
FLV - Adobe Flash Video
WMV - Windows Media Video
MOV - QuickTime video
M4A - MPEG-4 audio
M4V, MP4 - MPEG-4 video
3GP - Third Generation Partnership video
F4V - Adobe Flash video based on MPEG-4 Part 12
RM - RealMedia video
RMVB - RealMedia video (variable bitrate)
MKV - Matroska video
MPEG - Motion Picture Experts Group
AU - Sun Microsystems audio
MTS, M2TS - MPEG2 Transport Stream
R3D - RED Video Camera video
APE - Monkey's Audio file
OFR - OptimFROG lossless audio
PPM, PGM, PBM - Netpbm images
WEBM - WebM videos
Compressed archives:
ZIP - Widely used a compressed format developed by PKWARE
RAR - Roshal ARchive, used by WinRAR
7Z - Compressed format used by 7-Zip
GZ - Compressed format used by gzip
SIT - Compressed format used by StuffIt for Mac
ACE - WinAce archive
CAB - Microsoft Cabinet archive
SZDD - Compressed files created by COMPRESS.EXE from MS-DOS
Miscellaneous:
ISO - Images of optical media, such as CDs and DVDs
EXE - Windows or MS-DOS executable file
DLL - Windows or MS-DOS dynamic-link library
MDB - Microsoft Access database (2003 and below)
ACCDB - Microsoft Access database (2007 and above)
PST - Microsoft Outlook Personal Folders file
DBX - Microsoft Outlook Express data file
XAC - GnuCash data file
KMY - KMyMoney data file
DWG - AutoCAD drawing
DXF - Drawing Interchange Format
CHM - Microsoft Compiled HTML Help file
TTF, TTC - TrueType font
CLASS - Java class file
KMZ - Google Earth location data
FIT - Garmin activity file
WALLET - Armory Bitcoin wallet
WALLET.DAT - Bitcoin Core wallet
Recovering documents from your Recycle Bin
Common Features:
Works in Windows 10, Windows 8, Windows 7, Windows Vista, and Windows XP. Both 32-bit and 64-bit versions of Windows are supported.
Also works in Linux.
View recoverable files as a list, or as thumbnail previews.
Thumbnails will show previews of image files, album art from MP3 and WMA files, and icons from executable files!
Selecting a recoverable file brings up a full preview of the file (insofar as possible). For image files, it will show the image (with pan and zoom). For document files, it will show a text-only preview of the document. For certain audio files, it will allow you to play back the sound.
Previews of JPG and TIFF files will show EXIF information (camera model, date taken, sensor settings, etc.).
Previews of MP3 files will show ID3 information (artist, album, genre, etc.).
Previews of ZIP files will show a list of files contained in the archive.
Advanced Features
Able to scan virtual disk image files:
E01 and EWF files (Expert Witness Format)
VMDK files (VMware disk image)
VHD files (Microsoft Virtual Hard Disk)
VDI files (VirtualBox disk image)
Direct binary disk images (acquired with <code>dd</code> or similar tools)
When digging deeper, ability to start scanning from a specific location on the disk.
When previewing files, the program optionally shows the first 4K bytes of the file as a hex dump.
To find more information go through remaining articles in our site like hard drive data recovery, SD card data Recovery, Android Data Recovery, USB flash drive data recovery, Linux Data Recovery, etc.
Also Read:
Recovering documents from a hard drive
#Recovering documents from a hard drive#DiskDigger#Recover lost files#smartphone#sd card data recovery#Deep file recovery from any drive#dig deeper#dig deep#digging#disk images#digging deeper#diskdigger importance#diskdigger features
3 notes
·
View notes
Text


#zoa#cho hyewon#jo hyewon#hyewon#weeekly#kpop#zoa icons#cho hyewon icons#jo hyewon icons#hyewon icons#weeekly icons#kpop icons#icons#psd#dng
29 notes
·
View notes
Text
Workplace xt image viewer pro render image issues

Workplace xt image viewer pro render image issues how to#
Workplace xt image viewer pro render image issues for mac#
Workplace xt image viewer pro render image issues install#
Workplace xt image viewer pro render image issues windows 10#
Workplace xt image viewer pro render image issues pro#
Workplace xt image viewer pro render image issues install#
Download and install FastStone Image Viewer on your Windows computer and open it.
Workplace xt image viewer pro render image issues windows 10#
How to view RAW files on Windows 10 with FastStone Image Viewer? JPEG, BMP, GIF, PNG, TIFF, PCX, TGA, JPEG2, PSD, EPS, WMF, CUR, ICOġ1 RAW formats including CRW, CR2, NEF, PEF, MRW, ORF, SRF, SR2, ARW, RW2, DNG, etc. Just learn the supported RAW formats below: Photo Files However, this free RAW viewer is only compatible with the Windows operation system. It not only supports also the major features of a RAW image viewer but also supports musical slideshow with 150+ transitional effects. FastStone Image Viewer Free RAW Viewer to View RAW Files on Windows 10įastStone Image Viewer is a free RAW viewer with a fast, stable, user-friendly application. Note: Learn more detailed usage, you can read a step-by-step guide of WidsMob Viewer. You can view the RAW thumbnails or click one of the RAW images to view in full-screen mode, slideshow mode, or library mode. The RAW images on the folder will be displayed on the right side of the interface at high speed. You can click + or - icons on the top to add or remove a folder. Open a RAW images folder in the Library left panel. Download and install WidsMob Viewer on your Mac and launch it.
Workplace xt image viewer pro render image issues how to#
Win Download Mac Download How to view RAW files on Mac with WidsMob Viewer Pro? JPEG, JPG, JPE, PNG, TIFF, TIF, BMP, GIF, ICO, PSD, JP2, JPF, JPX, J2K, J2C, TGA, ICNS, XBM, DCRģ5 RAW formats including RAF, 3FR, RAW, MOS, MRW, RAF, PEF, ORF, NEF, ERF, RWL, EXR, SGI, DNG, CR2, CRW, ARW, SRF, X3F, KDC, SR2, ARI, R3D, MDC, FFF, MEF, RW2, RWZ, PEF, etc. It still needs a long way to perfect the whole program. It should be one of the best CR2 viewers on Mac.
Workplace xt image viewer pro render image issues for mac#
This RAW file viewer for Mac is a Retina-aware application and the RAW viewer for Windows supports 3D and touch gesture. You can also find the batch functions and sorting tools. It can handle more than 35 RAW formats with fundamental editing tools in the batch process.
Workplace xt image viewer pro render image issues pro#
WidsMob Viewer Pro is one of the best RAW photo viewers to handle a large amount of RAW files with 5X speed. WidsMob Viewer Pro RAW Image Viewer for Mac to Handle Large Amount of RAW Files in High Speed Or you can save your time to continue reading our introduction of 10 best RAW image viewers to view RAW photos effectively in different circumstances. Since sometimes free is not promised a high quality, the cost-effective program would be a better option.Īfter listing these features, you can easily find the best RAW image viewer for yourself. It would be better to be freeware or open-source. It should be an essential feature for Photographers, to rename, convert, and resize the photos for creating photo albums or uploading online. Batch processabilityīatch process to ease the work for a large amount of RAW files. Better with RAW edit functionsĪs the best RAW image viewers, the editing features to crop photos without losing quality, adjust the effects of files, rotate, and flip the photos. Photo Files: ANI / CUR / AWD / B3D / CAM / JPEG / BMP / GIF / PNG / TIFF / PCX / TGA / JPEG2 / PSD / EPS / WMF / CUR / ICO / IMG / PCD / JNG and other photo formats.īesides, it should provide a fluid display with high quality and EXIF information. For example, support Right/Left arrow image switching and zooming. Many people refer that they hope the RAW photo viewer would be easy to use. It would even better the RAW image viewer can load the RAW thumbnails first to let you preview the photos before opening a specific one. The speed would be more important would you open numerous numbers of RAW files. The RAW formats are much larger than the JPEG files and other image file formats, it would take more time to load. 3fr (Hasselblad)Įven if you only have a Canon camera, you might need more than a CR2 viewer, because you might also use the RAW format of Photoshop. Raw filename extensions and respective camera manufacturers. You can check the following image to learn RAW filename extensions and respective camera manufacturers to confirm the RAW files you have. Support as many RAW formats of different camera types as possible Just learn more detail about the RAW viewer features as below. So in mention of the best RAW photo viewers, some of the features should be a consideration. Some bundled versions of RAW viewers provided by the camera manufacturers might only enable you to view images or manage a format. Generally speaking, RAW photo viewers can browse, edit, and manage different RAW files with various cameras. Best RAW File Viewer Features You May Concern

0 notes
Text
On1 resize 10 windows download

On1 resize 10 windows download install#
On1 resize 10 windows download software#
The utility offers support for batch processing, which means you can add multiple files to the list and process them at the same time. iOS Devices, Web & Email, Epson Canvas), lets you create a list with favorite ones, select the resolution, as well as apply special effects (sharpening, film grain). The tool comprises several preset resizing modes (e.g. ON1 Resize Premium Edition works with the following file formats: JPEG, PSD, ARW, CAP, CRW, DNG, DRF, MRW, RAW, SRF, TIFF, and others. You can quickly resize photos without loss of sharpness or detail.
On1 resize 10 windows download install#
This allnew superresolution technology will allow any photographer to enlarge photos while quickly maintaining and recovering an incredible amount of detail and sharpness. To install ON1 Resize 2022, double-click the installer icon and allow the installer to guide. It is the ultimate image resizer for when you need the highest quality enlargements with Genuine Fractals technology to resize your photos for print. ON1 Resize AI, the nextgeneration photo enlargement software, gives photographers the highest quality photo enlargements. This all-new super-resolution technology will allow any photographer to enlarge photos while quickly maintaining and recovering an incredible amount of detail and sharpness. freeload ON1 Resize 2022 for Windows. ON1 Effects 2022.5 (16.6) add to watchlist send us an update. The file size of the latest setup package available for download is 681.6 MB. This download was scanned by our built-in antivirus and was rated as clean. ON1 Resize AI, the next-generation photo enlargement software, gives photographers the highest quality photo enlargements. Commonly, this program's installer has the following filenames: ON1 Effects 10.exe, ON1 Effects Free 10.exe, ON1 Photo 10.exe, ON1 Photo RAW 2017.exe and ON1 Resize 10.exe etc.
On1 resize 10 windows download software#
Users must keep in mind that this software has many hardware and software dependencies that must be met to be able to run the software efficiently. Still the Industry Standard for Photo Enlargements. ON1 Resize 2017 is a professional software application whose purpose is to help users resize and edit images.Īlthough it comes bundled with many dedicated parameters, the layout is clean and straightforward.

0 notes
Text

#hollywood undead#hollywood undead icon#hollywood undead army#hu army#dove and grenade#dng#red aesthetic
28 notes
·
View notes
Text
Adobe dng converter x3f

Adobe dng converter x3f serial numbers#
The DNG file will often be readable by earlier versions, depending on the camera model.Ĭamera Raw 5.4 and later: The DNG file will be readable by Camera Raw 5.4 (Photoshop CS4) and later, and Lightroom 2.4 and later. The DNG file will often be readable by earlier versions, depending on the camera model.Ĭamera Raw 4.6 and later: The DNG file will be readable by Camera Raw 4.6 (Photoshop CS3) and later, and Lightroom 2.1 and later. In the Preferences section of the DNG Converter dialog box, click Change Preferences.Ĭamera Raw 2.4 and later: The DNG file will be readable by Camera Raw 2.4 (Photoshop CS) and later, and Lightroom 1.0 and laterĬamera Raw 4.1 and later: The DNG file will be readable by Camera Raw 4.1 (Photoshop CS3) and later, and Lightroom 1.1 and later.To change compatibility preferences, follow these steps: Click Convert. A dialog box showing the status of the conversion appears.If necessary, change the compatibility preferences.You can choose the extension to be either uppercase or lowercase. Specify the following additional settings for the DNG file names:īegin numbering: Enter the starting serial number if you'd like it to be different from 1.įile Extension: The file extension is automatically set to DNG.
Adobe dng converter x3f serial numbers#
Select a naming pattern for the new DNG files:ĭocument Name: The existing name of the file is used with the DNG extension added.Īdd serial numbers or letters to the name: Advanced patterns an example of the resulting name appears after Name Example.Select the location where you want to save the converted DNG files.Select the folder of images you'd like to convert to DNG.This action automatically launches the converter. Alternatively, drag and drop individual images or a folder of images directly onto the Adobe DNG Converter icon. Launch the DNG Converter by double-clicking its icon.

0 notes
Text
Proshow producer 6 crack

#PROSHOW PRODUCER 6 CRACK HOW TO#
#PROSHOW PRODUCER 6 CRACK SERIAL KEY#
#PROSHOW PRODUCER 6 CRACK FULL VERSION#
Include your unique branding information and logo on PC shows and DVD menus to promote your business.
B2: Truy cp vào th mc cha file va ti v, gii nén.
Watermark all the slides in your display with one click. Hng dn cài t và crack Proshow Producer 6.0 bng hình nh m bo thành công 100: B1: Bn ti v máy bn Proshow Producer 6.0 full Crack theo link trên.
Picture Frames point allows you to output JPeG data of individual slide for printing.
Disconnect Internet connection (recommended). First of all download this software from given below link: Drive, Mega, Mediafire, Megaup, Tusfiles.
#PROSHOW PRODUCER 6 CRACK HOW TO#
ProShow Producer provides native support for RAW files from digital cameras. How To Crack and Install Photodex Proshow Producer : 01.Use slideshow templates to boost productivity.Photodex, the company responsible for ProShow, was founded in 1987 with the sole purpose of creating good software.
#PROSHOW PRODUCER 6 CRACK FULL VERSION#
new ProShow Gold 6 Crack + Registration Key Full Version freeload from the link given below: ProShow Gold Crack for windows xp, 7, 8, 8.1.
#PROSHOW PRODUCER 6 CRACK SERIAL KEY#
Save an audio track directly from a CD and drop it right into your slide show. Proshow Gold Full Version Crack Serial Key Free.
This program is an intellectual property of Photodex Corporation. Also the program is known as 'ProShow', 'Photodex ProShow'. Download ProShow Producer from our website for free. Protect your works and add watermarks and custom icons.
Enhance slide shows by dropping in each MP3 or WAV audio file. Apply animations or create your own ones.
Use caption keyframing to produce multiple caption motion effects on a single slide. Download Proshow Producer Full Crack Update: Bn cài t này mình update cho mt s bn hin ti vn cha cài c proshow.
Control the font, size, and appearance of captions in your slides.
Add motion like pan, zoom and rotate to any layer on a slide for a cinematic effect.
Create Hollywood-style greenscreen effects with the all-new Chroma Key Transparency tool.
Drag and drop to quickly add content to a show. Proshow Producer full crack So vi phiên bn Proshow Producer phiên bn 5.
Do vic cài t Proshow Producer cng rt là d nên mình s b qua bc. Hng Dn Crack Proshow Producer 9 n Gin Nht. vic download c d dàng hn bn nên download phn mm IDM mi nht này và s dng nhé.
Add an unlimited quantity of layers to each slide. Link Crack Download Proshow Producer 9 Link D Phòng.
ProShow Producer 9.1.0 Crack + Activation Key freeload FEATURES When you’re ready to take total command, ProShow Producer freeload offers up some seriously powerful tools and effects to customize every aspect of your slideshow. Browse hundreds of royalty-free tracks in the built-in music library to find the perfect soundtrack for your show quickly. Bc 2: Copy toàn b file trong th mc Activate proshow producer 9 gm các file (all.dnt, if.dnt, pshow.dnt). Proshow Producer 6 Keygen And Crack Download. Bc 1: Download file crack proshow producer v máy sau ó tin hành gii nén bng winrar. Perfect for weddings, engagements, family photos, nature and outdoor shots, travel photography and more. Combine photos, videos + musicto create amazing video slideshowswith a whole new level of creative freedom. Create a show in just minutes with professional themes and effects. ProShow Producer Registration Key offers the perfect mix of creative control and ease-of-use.

0 notes
Text
Photo exif editor

Photo exif editor serial number#
Photo exif editor full#
Photo exif editor serial number#
EXIF: Artist, Image Description, Copyright, Software, User Comment, Camera Make, Model, Owner Name, Serial Number, Date/Time Original, Creation Date, Modify Date, ISO, F Number, Focal Length, Focal Length In 35mm Format, Flash, Orientation, Exposure Mode, Exposure Program, Exposure Time, Metering Mode, Scene Capture Type, White Balance, Saturation, Sensing Method, Sharpness, Subject Distance Range, Lens Make (as per app's standards), Lens Model(as per app's standards), Lens Serial Number (as per app's standards).**: Data of Camera model tag will not be changed ***: Data of Original date time tag will not be changed JPG Joint Photographic Experts Group JFIF format JPEG Joint Photographic Experts Group JFIF format JP2 JPEG-2000 JP2 File Format Syntax *** SRF Sony Digital Camera Raw Image (Cyber Shot) **
Photo exif editor full#
Photos EXIF Editor by Systweak Software supports full read/write of the following image file formats:
Flexibility to create Presets of repetitive metadata to speed up processing.
Automatically creates backup of the original metadata of the photo when writing.
Sets photo modification/original date-time from EXIF information.
Deletes metadata individually or of selected batch of photos.
Supports various image formats including RAW format.
Reads & writes EXIF, GPS, IPTC, XMP metadata and more.
Here are a few reasons which make it a MUST HAVE tool for your Mac: It is an intuitive app which can edit EXIF, IPTC & XMP data of thousands of photos quickly! Jpeg, png,dxv, cr2, crw, mrs, tiff, dng, nef, pef, sr2, srw, orf, pgf, raf, eps, xmp, gif, psd, tga, bmp, jp2 and so on.Photos EXIF Editor is developed by Systweak Software. Easy to find an edited field by a different color and identify the edited image by image state icon. One more thing, you can redo edit when you change your mind to give up your edit, and you can clear all by clicking the clear all button in the batch operation area.ġ1. You can quickly find the image you want to edit by typing the name to search in a large number of images Quick Search Allows You To Easily Find And Edit The Image’s Exif Metadata The most convenient function for you just wants to search all the EXIF data and replace some image’s EXIF data with other words.ĩ. Batch find and replace the image’s EXIF data You just need one click to clone an image’s EXIF data to other images. If you want to save the image’s EXIF data or share them with others, you can export the EXIF data of images with. Now, you can rename image files use the Exif data of the images, addition with other fantastic rename functions. Other amazing features you can find when you use this function. GPS Geolocation Edit is so commonly used, so Image Exif Editor enhanced GPS geolocation, you can search a palace and drag the pin to change to the destination, also you can input the latitude and longitude value to re-locate your images. You can see the place where your photo was taken on a map, and you can easily drag a pin to change a new place for your photo taken. Visible GPS Geolocation And Camera Information Edit Image Exif Editor support Batch images edit, you can apply one image modify to others, and you can batch modify or clear Exif metadataģ. You do not need to know more detail for change the image’s metadata, Image Exif Editor gives you many visible pre-set value for choice, So you just chose one for edit It’s so easy!
Support for Nikon/AutoFocus and Sony/FocusPosition Metadata.
One click to clone the image’s EXIF data.
Batch search and replace EXIF information.
It’s the most powerful tool to handle the EXIF information in your favorite images. Image Exif Editor was designed to present as many details about how a photo was taken in a clear and easy to understand format with powerful EXIF metadata editing capabilities.

1 note
·
View note